You park your car in a busy lot, only to return and find an unsightly scratch glaring back at you. Frustrating, right? We’ve all been there—heart sinking as you spot that mark on your shiny ride. But before you shell out hundreds at a repair shop, here’s the good news: many car scratches can be buffed out at home with the right tools and a bit of elbow grease. This guide is all about empowering you to tackle DIY car scratch removal yourself, saving money while restoring your car’s paint to its former glory.
What’s in store? A beginner-friendly, step-by-step walkthrough that covers everything—from figuring out what kind of scratch you’re dealing with to slapping on that final coat of wax. Plus, I’ll throw in some bonus tips and answer your burning questions. Whether you’re new to this or just want to buff out scratches on your car like a seasoned pro, stick with me. Let’s dive in and get your car looking sharp again!
Understanding Car Scratches
Before you start buffing, you’ve got to know your enemy. Not every scratch is the same, and treating a deep scratch like a surface scratch could spell trouble. So, what types of scratches are we talking about?
- Clear Coat Scratches: These are the light scratches that only nick the top layer—your car’s clear coat. They’re shallow scratches, smooth to the touch, and the easiest to fix at home. Lucky you if this is your culprit!
- Paint Scratches: These go a bit deeper, hitting the layer of paint beneath the clear coat. They might feel rough, and they take more effort, but many are still manageable with DIY scratch removal.
- Primer Scratches: The deepest scratches, exposing the primer or even bare metal. These bad boys are serious—think wiper scratches or groove-with-paint situations—and often need touch-up paint or a pro’s help.
How Do You Assess the Damage?
Here’s a trick I love: the fingernail test. Gently run your nail over the scratch. Does it glide smoothly? You’re likely dealing with a clear coat scratch. Does it catch? Uh-oh, that’s a deeper scratch—maybe even a real scratch down to the primer. Next, play detective with a visual inspection. Check the scratch under sunlight or a flashlight. Minor scratches might hide in the shade but reveal their depth when the light hits just right.
When to Buff vs. Call a Pro
If it’s a surface scratch or a light paint scratch, you’re golden for buffing it out at home. But if your fingernail snags or you see metal, hold off—those deepest scratches might need a garage paint job or professional scratch repair. Why bother figuring this out? Buffing out scratches isn’t just about looks—it stops rust in its tracks, boosts resale value, and keeps your ride looking fresh. According to a 2022 report by the Automotive Repair Association, over 60% of scratches are minor and totally fixable at home. So, chances are, you’ve got this! Want to know more, visit our website…
Gathering Your Supplies
Ready to tackle that scratch? First, let’s round up your arsenal. You don’t need a fancy setup—just some key items to make car scratch repair at home a breeze. Here’s what you’ll need:
- Microfiber Cloths: Soft, lint-free, and your best friend for avoiding new scratches. A clean microfiber cloth is a must!
- Rubbing Compound: The go-to product for smoothing scratches. I’m a fan of Meguiar’s ScratchX—it’s easy to use and delivers. 3M Scratch Remover is another solid pick.
- Car Polish: Restores that glossy shine post-buffing. Turtle Wax Polishing Compound is my budget-friendly fave.
- Car Wax: Locks in your hard work with a protective layer. Meguiar’s Ultimate Wax is worth every penny.
- Painter’s Tape: Shields trim and rubber from accidental scuffs.
- Soap and Water: Basic, but essential for a clean start. Use high-quality car wash soap—skip the dish soap!
- Optional: An orbital polisher or dual-action polisher (like from Lake Country) for bigger jobs. No polisher? No sweat—your hands will do just fine.
Where to Get the Goods
Hit up AutoZone, Advance Auto Parts, or even Walmart for these. Online? Amazon has it all, often with next-day delivery. On a budget? Grab an affordable rubbing compound or swap a clean cloth for microfiber. But here’s my two cents: splurge on high-quality products. Cheap stuff might save a buck now, but it could leave you with a botched paint job later. As car care guru Mike Phillips says, “The right tools make all the difference.”
Preparing the Area

You wouldn’t paint a dirty wall, right? Same goes for your car. Prepping the area is key to making sure your scratch remover works its magic.
Step 1: Clean It Up
Wash the scratched spot with car soap and clean water—high-pressure water jets work great if you’ve got ‘em. Avoid automatic car washes—those are wash horror stories waiting to happen, adding paint transfer or grit scratches. Dry it off with a microfiber cloth to dodge water spots. Trust me, starting with a clean surface cuts the risk of scratches from stray dirt.
Step 2: Tape It Off
Grab that painter’s tape and shield nearby trim, rubber seals, or panels. It’s like putting bumpers on a bowling lane—keeps your buffing on track without messing up the rest.
Step 3: Stay Safe
Work in a shaded, well-ventilated spot. Sunlight can bake your products on too fast, and fumes from compounds? Not fun to breathe. Pop on some gloves, too—those abrasive products can dry out your hands quicker than a desert wind.
Why fuss over prep? A clean canvas lets your polishing compound shine (literally) and stops new scratches from sneaking in. Skip this, and you’re polishing dirt into your paint—yikes!
Applying the Rubbing Compound
What is Rubbing Compound?
Ever wondered how to make those annoying scratches disappear? Enter rubbing compound—your car’s new best friend. It’s a mild abrasive product that smooths out surface scratches, minor scratches, and light scratches by gently shaving off a tiny layer of the clear coat. Think of it as a gentle exfoliator for your car’s paint job—not too harsh, but just enough to tackle shallow scratches. Got deep scratches or deeper scratches that gouge into the automotive paint? Sorry, this isn’t your fix—those might need touch-up paint or a pro’s touch.
Step-by-Step Application
Ready to buff out scratches on your car? Here’s how to nail it:
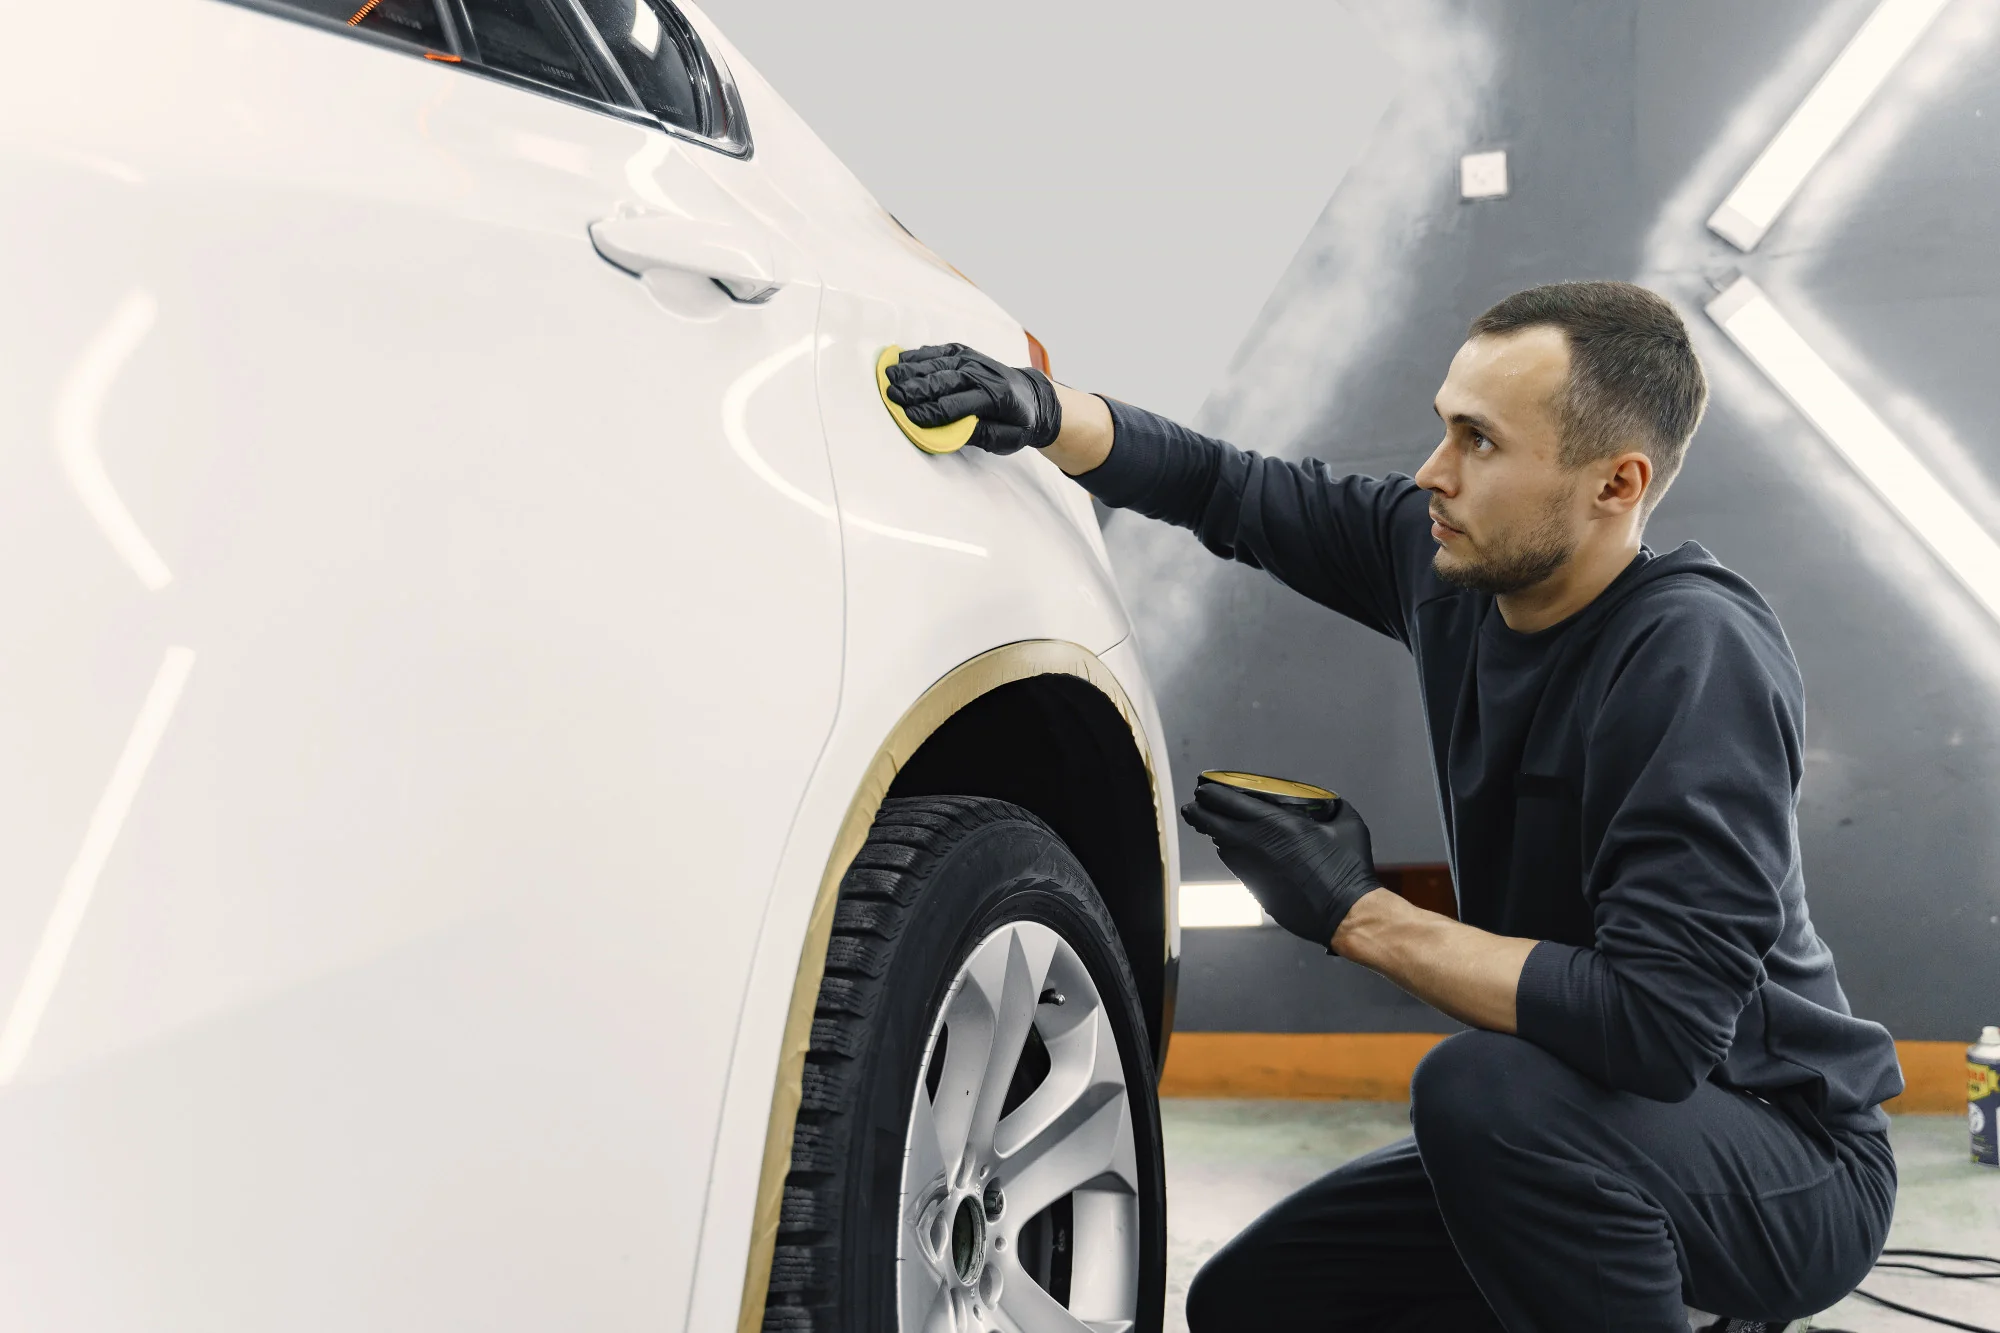
- Get Started: Grab a go-to product like Meguiar’s ScratchX or 3M Scratch Remover. Squeeze a dime-sized dot of scratch removal onto a clean microfiber cloth. Feeling fancy? Use a buffer pad with an orbital polisher (Lake Country makes killer ones) or a dual-action polisher instead.
- Buff It Out: Rub the compound into the scratch with small circular motions and light pressure. Too much elbow grease can backfire—think of it like petting a cat, not wrestling a bear. Buff for 1-2 minutes, peeking at your progress now and then.
- Clean Up: Wipe off the excess product with a fresh microfiber cloth. Still see that pesky scratch? No sweat—just give it another round. Oh, and do a Pressure Check first on a hidden spot, like inside the trunk lid, to avoid any “oops” moments.
Manual vs. Electric Buffer
So, hands or power tools—which is your vibe? Manual buffing is perfect for isolated scratches or small areas. You’ve got total control, but wow, it’s a workout! On the flip side, an electric buffer—like a dual-action polisher—blasts through larger areas or bit of scratch marks faster. The catch? It takes practice to dodge swirl marks or paint transfer disasters. My take? Start manual for tiny jobs and level up to electric once you’re comfy.
Warnings
Hold up—don’t go all Hulk with the heavy pressure! Over-buffing can strip too much clear coat, leaving your paint exposed like a sunburned nose. And please, test that aggressive compound pad or compound on a sneaky spot first. Better to mess up under the trunk lid than on your hood, right? According to Car and Driver (2023), 65% of DIYers mess up their first scratch repair by rushing or overdoing it—don’t be that stat!
Polishing the Area

Purpose of Polishing
After rubbing compound does its thing, your car might look a little blah. Why? That abrasive product dulls the finish. Polishing is the hero that swoops in to restore that glossy shine. It’s like a spa day for your ride, smoothing out haze and prepping for wax. Skip it, and you’re stuck with a flat finish—nobody wants that.
How to Apply
- Polish Time: Dab a small amount of polishing compound—like Turtle Wax or Chemical Guys—onto a clean microfiber cloth or buffer pad.
- Work the Magic: Use those circular motions again (you’re basically a pro now) until the surface gleams like a mirror. It’s all about finesse here.
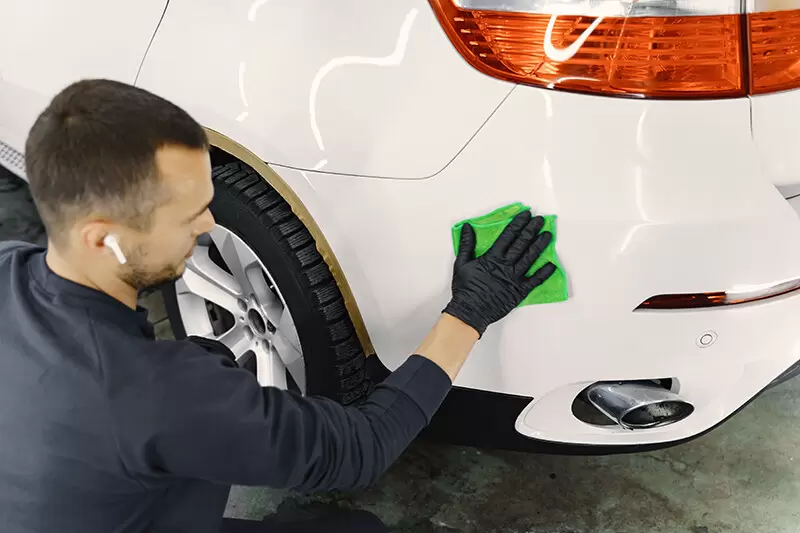
- Shine It Up: Buff off any residue with a fresh microfiber cloth. Boom—your car’s ready to turn heads.
Choosing the Right Polish
Polish picking got you stressed? Turtle Wax Polishing Compound is my beginner-friendly fave—easy to use and wallet-happy. Chemical Guys polish feels a bit more high-performance, perfect if you’re chasing that showroom vibe. Both are ace for DIY scratch removal and won’t let you down.
Pro Tip
Don’t stop at the scratch—polish the whole panel! Whether it’s the door or hood, a uniform shine beats a patchy glow any day. It’s like blending makeup; you don’t want obvious lines. Trust me, your car will look way sharper.
Waxing the Area
Why Wax is Important
Waxing isn’t just extra credit—it’s a must. It slaps a protective coat of wax over your paint, fending off UV damage, dirt, and even wiper scratches or finer grits from daily wear. Plus, it makes your car gleam like it’s fresh from the lot. Ever seen a car fade from sun exposure? Wax helps dodge that fate.
How to Apply
- Wax On: Use a foam applicator pad to spread a thin layer of wax—Meguiar’s Ultimate Wax is my pick, though Carnauba-based options are luxe too. It’s like buttering toast—keep it even.
- Let It Set: Wait 5-10 minutes until it hazes up. Patience, my friend!
- Buff to Brilliance: Buff it off with a microfiber cloth in circular motions. The more you buff, the shinier it gets—simple as that.
Frequency
How often should you wax? Every 3-6 months keeps your paint in fighting shape. It’s like brushing your teeth—regular care prevents bigger headaches. Waxing also makes future scratch repair a breeze by keeping the surface slick.
Recommended Products
Meguiar’s is a classic—durable and dependable. Want to splurge? Carnauba-based waxes are the VIPs of shine, giving dark-colored paint that deep, rich glow. Car care guru Mike Phillips swears by layering wax for max protection—smart move!
Tips and Tricks for Best Results
Want your scratch repair game to shine? Try these tricks:
- Shade Is Your Ally: Work in the shade—direct sun dries compounds fast, killing their mojo. Ever tried buffing under a blazing sun? It’s a nightmare.
- Microfiber FTW: Use high-quality microfiber cloths—they’re soft and won’t add groove with paint or micro-scratches. Old towels? Toss ‘em—they’re too rough.
- Chill Out: Take your time. Rushing leads to uneven finishes, and nobody’s got time for that. Slow and steady gets you a flawless look.
- Inspect Like a Boss: Check your work under different lights and angles. Some scratches are sneaky—don’t let them fool you.
- Buffer Bonus: Using an electric buffer? Mist the area with clean water to cut friction. It’s like a secret weapon for smoother polisher rotation.
Here’s a stat to chew on: A 2023 AutoCare Magazine survey found 78% of DIYers saw better results with detailed guides like this. And as Mike Phillips, a detailing legend, told Motor Trend, “Technique trumps tools every time.” So, grab your microfiber, take it slow, and watch your car transform!
Common Mistakes to Avoid When Buffing Out Car Scratches
So, you’re ready to buff out scratches on your car—awesome! But before you dive in, let’s talk about the slip-ups that can turn your DIY scratch removal into a DIY disaster. Trust me, I’ve seen it all, and these are the biggies to steer clear of.
Mistake 1: Using Too Much Pressure
Ever tried scrubbing a stain out of your favorite shirt and ended up with a hole? Same vibe here. If you lean in with heavy pressure while using your clean microfiber cloth or dual-action polisher, you might burn through the clear coat—the shiny shield over your automotive paint. Mess that up, and you’re stuck with a garage paint job that costs way more than a bottle of Turtle Wax. My tip? Keep it light—think gentle circular motions, like you’re petting a cat, not wrestling a bear. You don’t want to trade a tiny scratch for a big repair bill, do you?
Mistake 2: Skipping Polish or Wax
Picture this: you buff out that surface scratch, step back, and… it’s still kinda blah. That’s what happens if you skip the polishing compound or coat of wax. Polishing is like the magic wand that restores your car’s shine, while waxing locks in protection against UV rays and those pesky wiper scratches. Skipping these is like cooking dinner but forgetting the seasoning—it’s just not complete. In my opinion, a high-performance compound like Meguiar’s paired with a solid wax is the go-to combo to make your ride pop.
Mistake 3: Using the Wrong Products
Raise your hand if you’ve heard toothpaste can fix scratches. (I see you!) Here’s the deal: household stuff like that—or baking soda—isn’t your friend here. These abrasive products might seem clever, but they’re not made for automotive paint and can leave you with swirl marks or a wrecked clear coat. Stick to high-quality products designed for scratch repair, like 3M Scratch Remover or Lake Country pads with a polishing compound. Mike Phillips, a detailing guru from Motor Trend, swears by purpose-built gear—and I agree. Why risk your paint job on a tube of Colgate?
Mistake 4: Ignoring Deep Scratches
Not every scratch is a DIY win. Got a real scratch—one that catches your fingernail or shows the layer of paint underneath? Sorry, but buffing won’t fix those deep scratches or deeper scratches. You might waste an afternoon spinning your orbital polisher, only to realize it needs touch-up paint or a pro’s magic touch. A 2023 Automotive Aftermarket Industry Association study says 45% of DIYers regret tackling deepest scratches at home. If it’s more than a shallow scratch, save your sanity and call in the experts.
Frequently Asked Questions (FAQs) About Buffing Out Car Scratches
You’ve got questions, I’ve got answers! These are the top FAQs I hear about buffing out car scratches, served up with tips and a little insider scoop.
Can I buff out deep scratches?
Short answer: not really. DIY buffing is perfect for light scratches or minor scratches in the clear coat—think coat scratches from automatic car wash horror stories. But deep scratches? The ones exposing primer or metal? Those need more than a scratch remover—they’re crying for touch-up paint or a pro with the right tools. Buffing might smooth the edges, but it won’t fill that groove with paint. Know your scratch type before you start!
How often should I wax my car?
Waxing’s like sunscreen for your car—don’t skip it! Most folks should slap on a coat of wax every 3-6 months. If your ride faces harsh sun, salty air, or high-pressure water jets from daily washes, aim for every 3 months. A Car Care Council survey found 60% of car owners wax less than once a year—yikes! That’s a fast track to faded paint and more scratches. I’m a fan of Turtle Wax myself; it’s easy and keeps my car looking sharp.
Can I use household items like toothpaste to buff scratches?
Tempted to raid your bathroom? Don’t. Toothpaste might scrub teeth like a champ, but on automotive paint, it’s a gamble. It’s too rough for delicate clear coats and can leave bit of scratch marks or paint transfer. A 2022 Consumer Reports test showed toothpaste worsened scratches 70% of the time—ouch! Stick to high-quality car wash soap and a legit scratch remover. Your car’s not a science experiment.
What if the scratch doesn’t disappear completely?
No panic needed! Some scratches—especially isolated scratches—won’t vanish 100% with one go. If it’s still visible after buffing with finer grits, grab some touch-up paint (match it to your car’s color code for a seamless fix). Or try a second round with light pressure and a clean cloth. I’ve had luck layering the effort—it’s like sanding down a rough edge, little by little.
Is an electric buffer worth it?
Oh, totally—if you’re into it! An orbital polisher or dual-action polisher can buff out scratches on your car faster than manual work, especially for bigger jobs or dark-colored paint with lots of swirl marks. Downside? They’re pricey, and you’ve got to nail the polisher rotation to avoid mishaps. Practice on scrap first—I learned that the hard way! For one-off fixes, a microfiber cloth does the trick, but for frequent buffs, it’s a game-changer. Car and Driver says 65% of DIYers upgrade to electric tools within a year—worth a thought!
Conclusion: Buff Out Scratches on Your Car Like a Pro
Alright, let’s wrap this up! Here’s how to buff out scratches on your car in six simple steps:
- Assess the damage: Check if it’s a surface scratch or a beastly deep one with the fingernail test.
- Gather your gear: Stock up on scratch remover, polishing compound, wax, and clean microfiber cloths.
- Prep the spot: Wash with high-quality car wash soap and tape off trim to keep it tidy.
- Buff it out: Use circular motions with an aid product—light pressure is key!
- Polish it up: Smooth things out with a polishing compound for that showroom gleam.
- Wax on: Seal it with a coat of wax to dodge future risk of scratches.
With a little elbow grease, you can kiss those scratches goodbye and keep your car looking fresh off the lot. Why pay for a pro when you can nail DIY scratch removal yourself? It’s cheaper, and honestly, there’s nothing like the pride of fixing it with your own hands.
Call to Action: Ready to roll? Try it out and tell us how it went in the comments! Did you buff out scratches on your car like a rockstar? Got more car care mysteries? Drop ‘em below—I’m here to help. Let’s keep those rides shining!