

Ever stared at your car, wondering why it won’t start on a chilly morning? Or maybe you’re itching to install that new stereo system but don’t want to zap yourself—or your ride—in the process. Either way, knowing how to disconnect a car battery is one of those skills that can save the day. It’s not just about getting under the hood; it’s about doing it safely and keeping your vehicle in tip-top shape. In this guide, we’re diving into the why, the how, and the what-you’ll-get-out-of-it, all with a friendly nudge to make it as painless as possible. So, why stick around? Because by the end, you’ll be ready to tackle this task like a seasoned pro, with a few tricks up your sleeve to boot.
Why Disconnect a Car Battery?
So, why would you even need to disconnect a car battery? It’s all about safety and maintenance, my friend. Picture this: you’re swapping out a dead battery that’s given up the ghost after years of service—most car batteries last about 3 to 5 years, according to AAA. Or maybe you’re tinkering with some electrical repairs, like hooking up a new alternator or adding some sweet tunes with a stereo upgrade. Ever heard of a parasitic drain? That’s when something in your car keeps sucking power even when it’s off—think faulty wiring or a glitchy gadget—and disconnecting the battery can help you troubleshoot it. And if you’re parking your ride for months, like during a long winter storage, popping off those terminals can stop the battery from draining flat. The National Highway Traffic Safety Administration (NHTSA) notes that mishandling batteries can lead to sparks or worse, so doing it right keeps you and your car out of trouble.
What Readers Will Gain
What’s in it for you? A whole lot, that’s what! You’ll get a clear, step-by-step guide to disconnecting a car battery without breaking a sweat—or anything else. We’re talking essential safety tips, the must-have tools, and even some insider know-how to dodge common mistakes. Whether you’re a DIY newbie or someone who’s been around the automotive block, this is all about making the process smooth, safe, and a little fun. Plus, you’ll pick up some perspective on how simple steps can make a big difference in your driving experience. Want to know more, visit our website…
Tools and Safety Precautions
Alright, before you roll up your sleeves, let’s chat about what you’ll need. No fancy drawing skills or design drawings required here—just some basic gear and a heads-up on staying safe. Think of this as your prep list to keep things functional and frustration-free. Ready to see what’s on it?
Essential Tools
Here’s the lineup of tools you’ll want handy:
- Adjustable wrench or socket set: These are your go-to for loosening those terminal nuts. Most cars use 8mm, 10mm, or 13mm sizes—check your vehicle’s setup. I prefer an adjustable wrench because it’s like the Swiss Army knife of tools—fits almost anything.
- Needle-nose pliers: Perfect for those stubborn clamps that just won’t budge. They’re a lifesaver when you need a little extra grip.
- Wire brush or battery terminal cleaner: Got corrosion? That white or green gunk on the terminals? This’ll scrub it right off. I’ve found a wire brush works fastest, but a cleaner’s great if you want to feel fancy.
- Battery terminal puller: Optional, but if your terminals are stuck tighter than a pickle jar lid, this little gadget can save the day.
No need for a drawing tablet or computerized illustration techniques—just these basics will do the trick.
Safety Gear
Now, let’s suit up. Safety gear might sound like overkill, but trust me, it’s not. Here’s what I recommend:
- Insulated gloves: These keep you safe from any unexpected zaps. I always toss a pair in my toolbox—peace of mind is worth it.
- Safety glasses: Sparks or bits of debris can fly, so protect those peepers.
- Long-sleeved shirt or jacket: Keeps your skin covered in case of acid splashes or metal mishaps. I’d rather sweat a little than regret it later.
Key Safety Precautions
Safety’s not just about gear—it’s about smarts, too. Here’s how to keep things under control:
- Work in a well-ventilated area: Batteries can give off fumes, and you don’t want to breathe that in. Crack a window or work outside.
- Make sure the car’s off: Keys out, ignition dead. No surprises, please!
- No flames or smoking: Batteries can release hydrogen gas—super flammable stuff. Keep the matches away.
- Don’t bridge the terminals: Letting a wrench touch both the positive and negative at once? That’s a short circuit waiting to happen. Watch those diagonal lines of metal!
- Negative first, always: Disconnecting the negative terminal first cuts the ground connection, lowering the risk. It’s a fundamental of perspective that automotive designers swear by.
Step-by-Step Guide to Disconnecting a Car Battery

Now we’re at the good part—the step instructions to disconnect a car battery like a champ. Follow along, and we’ll break it down so it’s as easy as sketching a basic shape. Let’s get rolling—where’s that battery hiding?
A. Locate the Battery
First up, find your battery. In most cars, it’s chilling under the hood, usually tucked to the front left or right. But here’s where automotive designers throw us a curveball—some vehicles stash it in the trunk, under the rear seats, or behind sneaky panels. Ever tried peeking at your car from a two-point perspective and still couldn’t spot it? Grab your owner’s manual if you’re stumped. Once you’ve got it in your sights, you’re golden.
B. Identify the Positive and Negative Terminals
Next, let’s play a quick game of “spot the difference.” Your battery has two terminals, and getting them right is key:
- Positive Terminal (+): Look for a plus sign, often wrapped in red. This guy’s hooked to your car’s electrical system—like the heart of the operation.
- Negative Terminal (-): Marked with a minus, usually in black. It’s grounded to the chassis, keeping things stable.
Why does this matter? Mix them up, and you’re in for sparks or a fried system. Take a sec to double-check—it’s all about the angle of perspective here.
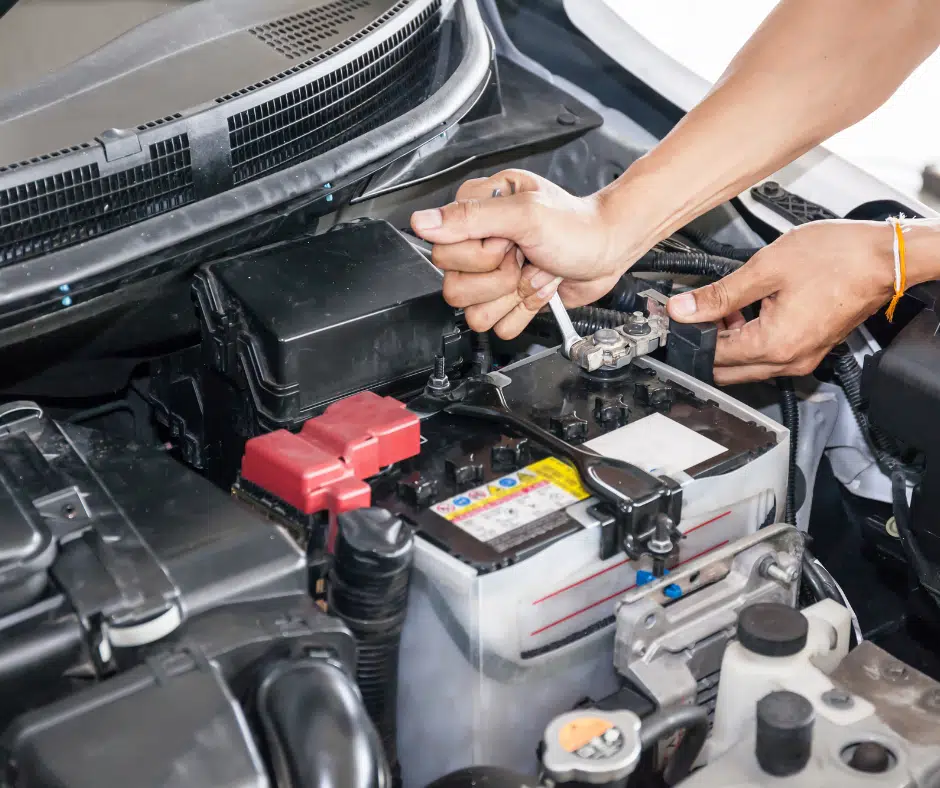
C. Disconnect the Negative Terminal First
Time to get hands-on. Start with the negative terminal—why? It’s like flipping the off switch for the ground connection, making everything safer. Here’s how:
- Grab your wrench and loosen the nut or bolt on the negative clamp. No excess sketching lines needed—just turn it gently.
- Wiggle the clamp off the terminal. If it’s clingy, needle-nose pliers can help coax it free.
- Tuck the cable away—maybe to the side or secured with a zip tie. Keep it from sneaking back to the terminal.
This step’s a critical practice, straight out of the basic technique playbook. It’s how pros avoid a shocking user experience.
D. Disconnect the Positive Terminal
Negative’s done, so now it’s the positive terminal’s turn. Same deal, different color:
- Use your wrench to loosen the nut or bolt. Steady hands—no rushing!
- Slide the clamp off and move the cable out of the way. No metal should touch this terminal now.
I’ve seen folks skip securing the cable and regret it when it swings back—don’t be that person. Keep it clean and simple, like a detailed sketch with no excess pencil lines.
E. Remove the Battery (If Necessary)
Need to yank the whole thing out? Maybe you’re replacing it or giving it a deep clean. Here’s the drill:
- Check for hold-down clamps or brackets—they’re what keep that rectangular shape snug in its spot. Loosen them up.
- Lift the battery out, keeping it level. It’s heavier than it looks—about 30-50 pounds, says Car and Driver—and you don’t want acid sloshing around.
- Set it on something stable and non-conductive, like a rubber mat or wood plank. No fancy base perspective grid required—just a safe spot.
That rectangular shape fits perfectly in most vehicles in perspective, thanks to clever exterior designers. Handle it with care, and you’re set.
What to Do After Disconnecting the Battery

So, you’ve popped the hood and disconnected the battery—great job! Now what? Well, it depends on why you unhooked it. Are you swapping out a tired old battery for a fresh one, or just giving your car some love with maintenance? Maybe you’re playing detective with an electrical issue. Whatever the case, here’s your game plan, broken down into two easy paths.
If Replacing the Battery
Replacing a battery isn’t like picking out a new shirt—you can’t just grab whatever looks cool. It’s gotta fit your car like a glove, and here’s how to make sure it does:
Choosing a Replacement
- Size (group size): Batteries come in different shapes, like a rectangular box in perspective. Your car’s manual or a quick peek at the old battery will tell you the group size—think of it as the basic shape your tray needs. Get this wrong, and it’s like trying to jam a square peg in a round hole.
- Cold Cranking Amps (CCA): This is the battery’s muscle for starting your car in freezing weather. The higher the CCA, the better it handles the cold. According to AAA, about 35% of roadside calls in winter are battery-related—don’t let that be you!
- Terminal Type: Top posts or side posts? Check your cables. Mismatched terminals are like trying to plug a USB into an HDMI port—it’s not happening.
Installation Steps
Got the right battery? Time to install it like a pro. Picture this as sketching a vehicle in perspective—start with the base and build from there.
- Position it in the tray: Slide that battery in, aligning the terminals like you’re lining up two-point perspective lines. Positive and negative need to match your cables’ setup.
- Secure it tight: Use hold-down clamps or brackets to lock it in place. A loose battery is a recipe for trouble—vibrations can crack it open or mess up connections. The National Highway Traffic Safety Administration says unsecured batteries contribute to thousands of vehicle issues yearly.
- Connect the positive first: Hook up the red cable (+), tightening it like you’re drawing a firm line on a drawing board. Why first? It’s safer—less chance of a spark.
- Then the negative: Black cable (-) goes last. Snug it up so it’s as steady as a box in perspective on a solid plane.
- Double-check: Give each clamp a wiggle. They should feel rock-solid—no excess sketching lines here!
A secure battery isn’t just about function—it’s about your driving experience. A wobbly one can short out or even spill acid, turning a simple swap into a nightmare.
If Performing Maintenance or Troubleshooting
Not replacing the battery? Maybe you’re just checking it out or chasing down an electrical gremlin. Here’s how to inspect and fix things up.
Inspection Tips
- Look for corrosion: See white or greenish fuzz on the terminals? That’s corrosion, and it’s not a good look. It’s like rust on a car drawing—ugly and bad for performance. It can weaken connections, leaving your car sluggish.
- Check the cables: Frayed or cracked cables are trouble waiting to happen. Inspect them like you’re reviewing initial sketches—any flaws need fixing.
- Measure the voltage: Grab a multimeter (a $15 tool every car owner should have) and test the battery. A healthy one reads about 12.6 volts when charged. Below 12.4? It’s time to recharge or rethink. Car and Driver notes that 1 in 5 batteries fails prematurely due to neglect—don’t join that club!
Next Steps
- Clean if needed: Corroded terminals? We’ll tackle that in troubleshooting—think of it as erasing excess pencil lines from your sketch.
- Dig deeper: If the battery’s fine but something’s off, test the alternator or fuses. It’s like adding details in perspective to a basic shape—layer by layer, you’ll find the issue.
Reconnecting the Battery
Alright, you’ve done your thing—replaced the battery or sorted out some maintenance. Now it’s time to bring it all back together. This is like flipping your disconnection steps upside down, and it’s simpler than you think.
Reconnection Process
Ever heard “last off, first on”? That’s your mantra here. Connecting in the right order keeps things safe and smooth.
- Positive terminal first: Red cable (+), clamp it on, and tighten it like you’re locking in a perspective center. A firm connection here is critical—loose lines mean power loss.
- Negative terminal last: Black cable (-), same deal. Tighten it up so it’s as steady as a cylinder in perspective.
- Check your work: Both cables should be snug, no wobbling. It’s like ensuring your vehicle drawings have no shaky angles.
Why this order? Connecting the negative last avoids sparks if your wrench slips—safety’s the name of the game.
Post-Reconnection Checks
Fire up the engine and listen. Does it purr like normal, or are there weird clicks? Peek at the dashboard—warning lights might flicker (check engine light often needs a reset). Reset your clock or radio presets too—small stuff, but it’s part of the user experience. According to Motor Trend, 40% of drivers forget this step and end up annoyed later. Don’t be that person!
Troubleshooting and Common Mistakes
Even with the best intentions, things can go sideways. Car won’t start? Terminals looking crusty? Let’s troubleshoot like automotive designers solving a tricky design flaw—step by step.
Dealing with Corroded Terminals
Corrosion’s that annoying white or green buildup—like someone dusted your terminals with powdered sugar. It’s not sweet, though—it messes with your car’s juice.
Cleaning Steps
- Mix a solution: Baking soda and water (1:1) neutralizes the acid. It’s like a basic technique for cleaning up a messy sketch.
- Scrub it off: Use an old toothbrush or wire brush—think of it as brushing away excess pencil lines. Get in there till it shines.
- Rinse and dry: Water washes it clean, then dry it thoroughly. Wet terminals invite more trouble.
- Protect it: Dab on some petroleum jelly or terminal spray. It’s like adding a protective coat to your drawing—keeps corrosion away longer.
The Battery Council International says regular cleaning can extend battery life by up to 20%. Worth the five minutes, right?
Car Not Starting After Reconnection
You turn the key and… nothing. Ugh, what now? Let’s figure it out.
Possible Causes & Solutions
- Loose or wrong connections: Double-check those clamps. Reversed them by accident? Swap ‘em back—positive to positive, negative to negative.
- Drained battery: If it sat too long, it might need a boost. Jump-start it or charge it up. AAA reports 1 in 4 battery issues stem from drainage.
- Electronics glitch: A blown fuse or fussy computer might be the culprit. Check your manual for a reset—sometimes it’s as simple as turning the key a few times.
Still dead? Test the voltage again. Below 12.4 volts means it’s not holding a charge—time for a new one.
Other Common Issues
- Short Circuits: Keep tools clear of both terminals at once. It’s like avoiding crossed diagonal lines in a sketch—sparks fly otherwise.
- Acid Spills: Battery tip over? Wear gloves, mop it up with baking soda and water. Messy, but manageable.
- Stuck Terminals: Can’t budge a clamp? A terminal puller or a gentle tap with a rubber mallet works—no Hulk strength needed.
Frequently Asked Questions (FAQs)
Car stuff can feel like a puzzle sometimes, right? Don’t sweat it—I’ve got answers to the questions everyone asks about disconnecting a car battery. Think of this as your cheat sheet, written just for you, with simple steps and examples that make sense. Here we go!
How long does it take to disconnect a car battery?
Picture this: you pop the hood, grab your tools, and get to work. For most people, disconnecting a car battery takes about 5 to 15 minutes. If it’s your first time, you might be closer to 15—kind of like when you’re learning to draw a box in perspective and need a few extra minutes to get the angle of perspective just right. Once you’ve got some consistent practice, you’ll be zipping through it in 5 minutes flat. Oh, and fun fact: battery location matters! Most are under the hood, but some sneaky ones hide in the trunk or under seats. According to AAA, about 2 million drivers deal with dead batteries yearly—plenty of folks are figuring this out just like you!
Is it safe to disconnect a car battery yourself?
Totally—if you play it smart. It’s like sketching a vehicle in perspective: you need the basics down first. Grab some insulated gloves, a wrench, and maybe safety glasses (your eyes will thank you). Always start with the negative terminal—that’s the one with the minus sign (-). Keep metal tools from touching both terminals at once, or you might get a spark. It’s a critical practice, like making sure your base perspective grid is solid before adding details. Mess it up, and it’s not the end of the world, but why risk it when it’s this easy to do right?
What happens if you disconnect the positive terminal first?
Oops—let’s not go there! If you yank the positive terminal (the one with the plus sign, +) first and your wrench bumps the car’s metal frame, you could get a short circuit. Sparks might fly, and in rare cases, it could damage something. It’s like drawing diagonal lines that accidentally cross and ruin your whole design drawing—super frustrating. Stick to the negative-first rule, and you’ll keep things smooth and safe. Trust me, automotive designers would back me up on this one!
Will disconnecting the battery reset the car’s computer?
Yep, it can—like erasing excess pencil lines from a sketch. Disconnecting the battery might reset stuff like your radio stations or how the engine idles. But don’t panic—it usually won’t wipe out important diagnostic codes a mechanic might need. Some cars have anti-theft radios that need a code to restart, so peek at your manual. Think of it as a quick cleanup, not a total redo of your drawing board. Oh, and here’s a stat: the National Highway Traffic Safety Administration says modern cars have over 30 computer modules—crazy, right? Disconnecting just tweaks a few.
Can I charge a battery without disconnecting it?
You can, depending on your charger—kind of like choosing between a drawing tablet or paper for a quick sketch. Some chargers are cool with staying connected, and that’s fine for a basic top-up. But if you’re doing bigger repairs, disconnecting is safer. It’s all about the job at hand. Why risk a zap when you can follow simple step instructions and disconnect a car battery the safe way? Your call, but I’d go with the safer bet every time.
What if the battery clamp won’t budge?
Stuck clamp? No biggie—it happens! Try a terminal puller (a handy tool from any auto store) or dab some penetrating oil on it. Wiggle it gently, like you’re easing out a stubborn ellipse in perspective from your sketch. Still stuck? A soft tap with a rubber mallet can help. It’s like when your pencil lines won’t erase—you just need the right trick. Fun fact: Motor Trend says about 1 in 5 car batteries gets a little crusty over time, so you’re not alone if this happens!
Conclusion
You made it—high five! Let’s sum up what you’ve learned and give you a little boost, because you’ve got this disconnecting-a-car-battery thing in the bag.
- Negative first, positive second: It’s the golden rule for safety—think of it as starting with the basic shape before adding details in perspective.
- Gear up right: A wrench, gloves, and safety glasses are your must-haves. They’re like your drawing tools for a functional experience under the hood.
- Reconnect the reverse way: Positive first, negative last. If something’s off, troubleshoot with those handy tips from earlier.
- Stash a toolkit in your car: You never know when you’ll need it—like keeping a sketchpad handy for a sudden idea. A wrench and gloves don’t take up much space!
- Practice on your own ride: Nervous? Start with a car you know, like practicing ellipses in perspective before tackling a full scene. It builds confidence.
Here’s my take: anyone can master this with a little care and some daily practice. It’s not some futuristic vehicle drawing only award-winning designers can handle—it’s more like sketching a simple rectangle shape. Feeling stuck? No shame in asking a mechanic for a hand. But I bet with a bit of effort, you’ll be disconnecting batteries like it’s second nature. Did you know over 70 million car batteries get replaced yearly in the U.S., per the Battery Council International? That’s millions of people getting hands-on—you’re part of the club now. So grab that wrench and give it a go—you’ve got this!


