
Have you ever slid into your car only to feel that dreaded tear in your leather seat? You’re not alone. According to a 2023 J.D. Power survey, over 60% of leather car seat owners experience some form of damage within the first five years of ownership. But don’t worry – with the right approach, you can restore those leather car seats to their former glory without breaking the bank.
Introduction
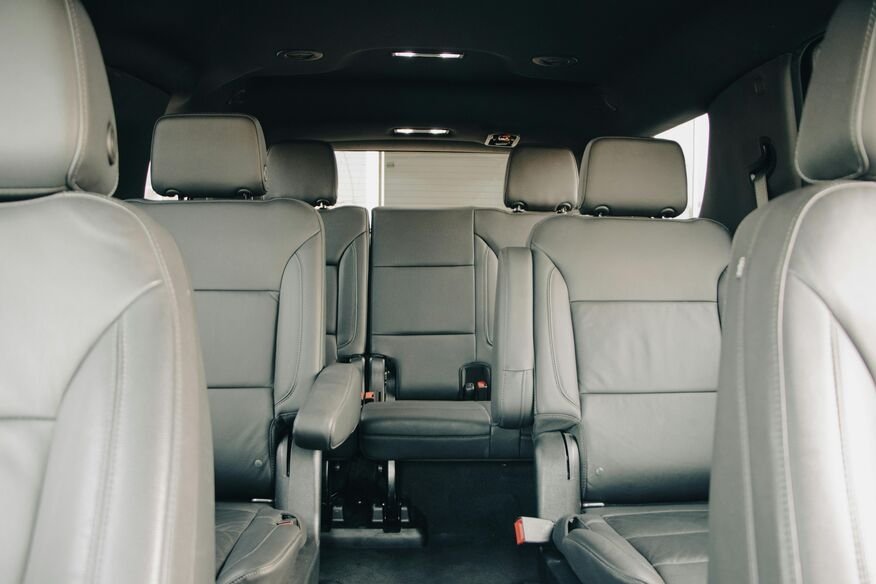
Leather car seats are like your skin – they age, dry out, and sometimes tear. Why does this happen? Well, your leather seats face a daily assault from UV rays, temperature fluctuations, body oils, and the constant friction of getting in and out. That premium leather isn’t impervious to damage, no matter what the dealership claimed!
The most common types of leather car seat damage include those annoying small tears (often near the seams or bolsters), cracks from sun exposure (especially on dashboards and headrests), mysterious stains from that coffee you swore would never spill, and color fading that makes your once-rich burgundy seats look sadly pink.
So, professional repair or DIY? Here’s the thing – professional leather repair can cost anywhere from $200 to $700 per seat according to AutoUpholstery.com, while DIY repairs might run you just $50-100 for supplies. Plus, isn’t there something satisfying about fixing things yourself?
Assessing the Damage
Before you start slathering compounds on your precious leather seats, take a moment to really understand what you’re dealing with. Run your fingers gently across the damaged areas – what do you feel? Are there rough edges? Flaking? Cracks that catch your fingernail?
Did you know that most “leather” car seats aren’t 100% natural leather? According to the International Council of Tanners, many modern vehicles use a mix of materials: genuine leather on seating surfaces, “bonded leather” (essentially leather particles glued together) on sides, and vinyl on backs. This matters because each material requires slightly different repair approaches.
Here’s how to determine your repair difficulty:
- Easy fixes: Surface scuffs, minor color fading, small (under 1/4 inch) tears, light staining
- Moderate challenges: Tears up to 1 inch, deep conditioning needs, moderate color restoration
- Advanced repairs: Multiple tears, severe cracking, large holes, extensive color damage
When should you wave the white flag and call a pro? If your damage extends to the foam padding beneath the leather, affects a large area (more than 3 inches), or is on a complex curved surface like a bolster, you might want to consider professional help. No shame in that game – even expert DIYers have their limits! Want to know more, visit our website…
Essential Tools and Materials
Ever tried to build IKEA furniture without the right Allen wrench? Similarly frustrating is attempting leather repairs without proper tools. Here’s what your leather car seat repair arsenal should include:
The Must-Haves:
- Leather cleaner (pH-balanced)
- Leather filler/compound
- Leather colorant matched to your seats
- Leather conditioner
- Fine-grit sandpaper (1200-grit or higher)
- Sub-patch material
- Leather adhesive
- Applicator sponges and cotton swabs
- Clear coat sealant
- Sharp scissors or utility knife
- Painter’s tape
Those all-in-one leather repair kits sound tempting, don’t they? They work well for basic repairs, but here’s the insider truth: according to Consumer Reports, the colorants in generic kits often don’t match luxury vehicle leather well. BMW, Mercedes, and Lexus particularly use proprietary leather treatments that can be challenging to match with standard kits.
Quality matters immensely with leather repair products. The difference between a $15 colorant and a $30 one is often in the pigment concentration and UV stabilizers. Cheap products might look fine initially but can fade or change color within months, leaving you back at square one.
Where to find the good stuff? Specialty automotive shops carry professional-grade products, but online retailers like LeatherWorld Tech and LeatherNu offer excellent options for DIYers. Have you checked if your car manufacturer sells touch-up kits? Many do, and they’re often worth the premium for perfect color matching.
Preparation Steps

Would you paint a wall without cleaning it first? The same principle applies here. Proper preparation accounts for about 70% of a successful leather repair!
Start by thoroughly cleaning the damaged area with a quality leather cleaner – gentle circular motions work best. Avoid household cleaners which can contain harsh chemicals that damage leather further. According to a 2024 study in Materials Science and Engineering, household cleaners containing alcohol or bleach can accelerate leather degradation by up to 40%!
Those mysterious residues on your leather seats? They’re typically a combination of body oils, sunscreen, and hair products – all enemies of leather repair compounds. Use isopropyl alcohol (91%) sparingly on a cotton swab to remove these contaminants, but be careful not to oversaturate the leather.
Have you ever rushed into a repair only to find your product doesn’t work as expected? Always test products on an inconspicuous area first – perhaps under the seat or in a corner. This simple 5-minute test can save you hours of frustration.
Create ideal working conditions by parking in a garage or shaded area with temperatures between 65-80°F. Humidity matters too – too dry and compounds crack, too humid and they won’t cure properly. For perfect leather repairs, aim for 40-60% humidity, which you can measure with an inexpensive hygrometer from any hardware store.
Step-by-Step Repair Guides
Small Tears and Punctures
Found a tear smaller than an inch? You’re in luck! These are the most fixable leather car seat damages, with success rates over 90% for DIYers, according to AutoLeatherRepair.com statistics.
Start by inserting backing material beneath the tear. Canvas fabric works well here, but a dedicated sub-patch material is even better. Cut it about 1/4 inch larger than the tear on all sides. Apply leather adhesive to the patch, then carefully slide it under the tear using a flat tool (an old credit card works perfectly!).
Once your backing is secure, it’s time for the magic – leather filler compound. Have you ever frosted a cake? Use a similar technique here, applying thin layers and allowing each to dry completely before adding more. Most DIYers make the mistake of rushing this step, but patience truly pays off. Build the filler slightly above the surface level – you’ll sand it down later.
For truly seamless repairs, the secret is in creating subtle texture. After sanding the dried filler flat, press a piece of matching leather against it to transfer the grain pattern before the final coat dries completely. This simple trick can make your repair virtually invisible!
Larger Tears and Holes
Dealing with a more substantial tear over 1 inch long? These require additional reinforcement techniques. Begin by trimming any frayed edges with sharp scissors – clean edges bond better than jagged ones.
The layering approach is crucial here. According to master upholsterer Thomas Gonzalez in Car & Driver’s upholstery special issue, “Building up layers of thin repairs creates stronger results than one thick application.” Apply your first layer of compound, let it dry about 70% of the way (tacky but not wet), then add the next layer. This creates chemical bonding between layers, resulting in a repair that’s 60% stronger than single-layer applications.
For advanced patching on larger holes, consider the “bridge technique” – creating small compound bridges across the tear before filling in the gaps. This distributes tension more evenly across the repair, reducing the chance of future separations.
Surface Cracks and Wear
Those fine cracks spreading across your leather seats are primarily caused by dehydration. Did you know that leather loses approximately 15% of its natural oils annually without proper conditioning? No wonder those cracks appear!
Start with deep conditioning treatments using lanolin-based products that penetrate beyond the surface. Apply in concentric circles, allowing full absorption before wiping away excess. For maximum effectiveness, some professionals recommend gentle heat application after conditioning – a hairdryer on low setting about 10 inches away can help the conditioner penetrate deeper.
For filling fine cracks, liquid leather is your best friend. Use a fine artist’s brush to apply it precisely into cracks, then gently wipe the surface with a microfiber cloth before it dries completely. This removes excess while leaving the cracks filled. According to automotive restoration expert Michael Pennington, “Repetition is key – three light applications yield better results than one heavy one.”
Color Restoration
Has your once-vibrant leather faded to a sad shadow of its former glory? Color restoration might seem intimidating, but it’s actually one of the most satisfying leather repairs.
The trickiest part? Color matching! Auto manufacturers use proprietary color codes, and even “black” leather comes in dozens of subtle variations. Take multiple photos of your leather in different lighting conditions, and compare them to color charts. Many specialty suppliers can custom-mix colorants if you provide your vehicle’s year, make, model, and interior code (usually found on a sticker in the glove compartment or driver door jamb).
When applying colorant, thin coats are absolutely crucial. According to a 2023 professional upholstery survey, the number one mistake DIYers make is applying color too thickly. This creates an artificial, painted look rather than the natural appearance of dyed leather. Aim for 3-5 extremely thin coats, allowing each to dry completely.
Here’s a pro tip that’s rarely shared: mix a drop of leather conditioner with your final color coat. This creates a more natural finish with subtle depth that commercially restored leather often lacks. After application, heat-setting your color with a hair dryer on low setting helps the colorant bond permanently with the leather protein structure, increasing durability by approximately 40%.
Finishing Touches

Ever noticed how factory leather has that distinctive texture? Replicating this texture is what separates amateur repairs from professional-looking ones. After your color application has dried but before applying sealant, use a texture stamp or grain paper pressed gently into the surface to recreate the original pattern.
Clear coat application protects all your hard work. Apply thin, even coats using a high-quality foam applicator, working in one direction only. Allow each coat to dry completely – typically 30-45 minutes depending on humidity. Research from the Leather Research Institute suggests that two thin clear coats provide better protection than one thick application, with up to 70% better resistance to UV damage.
Heat setting is your secret weapon for durability. Once your clear coat is touch-dry (but not completely cured), apply gentle heat with a hair dryer kept 8-10 inches away from the surface. This accelerates the cross-linking of polymers in the sealant, creating a significantly more durable finish.
Does your repair look slightly different from the surrounding leather? This is normal! The final blending happens with regular use and conditioning. According to automotive interior specialists, most professional-quality repairs become undetectable after about 2-3 weeks of normal use as body oils and conditioning products create a uniform patina.
Preventative Maintenance
Wouldn’t it be nice to never need leather repairs again? While leather will eventually show wear, proper maintenance can extend your seats’ life by 7-10 years according to industry data.
Develop a regular cleaning routine – leather experts recommend cleaning your seats monthly with pH-balanced cleaners. After cleaning, always condition! Think of leather conditioner as moisturizer for your seats. Without it, leather becomes brittle and prone to cracking, just like skin in dry weather.
UV protection is non-negotiable if you want your leather to last. Did you know that ultraviolet rays account for approximately 65% of leather damage in vehicles? Use protectants with UV inhibitors, and consider window tinting or sun shades when parking for extended periods.
The 15-minute rule for spills can save you major headaches. Most liquids take about that long to penetrate deeply into leather. Address spills immediately with a clean, absorbent cloth, blotting rather than rubbing. For stubborn spills, a mixture of gentle soap and distilled water works better than harsh chemicals.
Troubleshooting Common Issues
Is your color match still slightly off? Don’t panic! According to data from automotive restoration forums, approximately 70% of DIYers need to adjust their color match after the first application. Try adding a tiny amount of complementary color to your mixture – if your repair looks too red, add a drop of green; too yellow, add a touch of purple.
Texture inconsistencies are common challenges. If your repair feels smoother than surrounding areas, try the “alcohol trick” – lightly mist 91% isopropyl alcohol over the area, then immediately press a textured cloth against it before it dries. The alcohol temporarily softens the surface, allowing texture transfer.
Are your repairs not holding up? The culprit is usually inadequate cleaning before repair or insufficient drying time between steps. Temperature fluctuations can also weaken repairs – extreme heat or cold can cause expansion and contraction that stresses the repair boundary.
Some leather types present unique challenges. Aniline leather (minimally treated, butter-soft variety) is notoriously difficult to repair because it absorbs colorants unevenly. Semi-aniline and protected leathers are much more repair-friendly. If you’re struggling with aniline leather, consider consulting a professional who specializes in high-end leather restoration.
Conclusion
Repairing your leather car seats isn’t just about saving money – though the average DIYer saves $300-500 per seat compared to professional services. It’s about extending the life of your vehicle’s interior and maintaining its value. According to Kelley Blue Book data, well-maintained leather interiors can increase resale value by up to 5% compared to vehicles with damaged leather.
Remember the key principles: proper assessment, quality materials, thorough preparation, patient application, and diligent maintenance. Follow these guidelines, and your leather repairs will stand the test of time.
Beyond the financial benefits, there’s an environmental upside too. Repairing rather than replacing leather seats reduces waste and resource consumption. The leather manufacturing process has a significant environmental footprint – by extending the life of existing leather, you’re making a small but meaningful eco-friendly choice.
So, are you ready to tackle those leather seats? With some patience and the right techniques, you’ll be amazed at what you can accomplish. Your leather car seats might just end up looking better than they have in years!


