Ever parked your car in a busy lot, feeling all proud of your shiny ride, only to come back and spot a fresh scratch mocking you from the door? Ugh, talk about a mood-killer! Scratches are a pesky headache for over 60% of car owners, according to a survey by AutoCare Magazine. Whether it’s a sneaky shopping cart scrape or a deeper gash from a rogue key, those annoying scratches can make your car look like it’s been through the wringer. But don’t worry—I’ve got your back!
Why should you care about those little (or not-so-little) marks? Well, beyond ruining your car’s good looks, scratches can hit you where it hurts: your wallet. A car with visible scratch damage can drop its resale value by up to 10%, says Kelley Blue Book. And if you ignore deep car scratches? You’re basically rolling out the red carpet for rust, which could mean costly repairs later. No thanks! In this guide, I’ll walk you through everything you need to know to tackle scratch repair at home—from figuring out what type of scratch you’re dealing with to picking the best tools and techniques. Ready to make those scratches disappear? Let’s dive in!
Understanding Car Scratches
Before you start slathering on scratch remover product, let’s get one thing straight: not all scratches are the same. Knowing what you’re up against is half the battle. So, what kind of scratch are we talking about here?
Types of Scratches
- Clear Coat Scratches: These are the lightweight champs—superficial scratches that only mess with the top protective layer of your car’s paint. Run your fingernail over it. Doesn’t catch? You’ve got a minor scratch that’s a breeze to fix.
- Paint Scratches: These bad boys dig a bit deeper, hitting the colored paint layer under the clearcoat finish. If your fingernail catches just a tad, it’s a paint scratch. A little more work, but still totally doable.
- Deep Scratches: The heavy hitters. These expose the primer or even the metal underneath. Fingernail snags big time? You’re dealing with deep car scratches. They’re trickier, and sometimes you might need to call in the pros—but we’ll try some DIY magic first.
Why does this matter? Because using the wrong scratch removal method is like bringing a spoon to a knife fight—it just won’t cut it. Identifying the type of scratch helps you pick the right tools and decide if you can handle it yourself or if it’s time to wave the white flag and head to an auto body shop.
Quick Trick: Try the “fingernail test.” It’s a simple, no-tools-needed way to figure out what you’re working with. Pretty cool, right?
Tools and Materials You’ll Need
Alright, you’ve sized up your enemy—now let’s arm you for battle. Having the right gear makes scratch repair way easier, so here’s what you’ll need.
Essential Items
- Scratch Remover: Perfect for those light scratches on the clear coat. Brands like Meguiar’s ScratchX are my go-to—they’re affordable and get the job done.
- Polishing Compound: For paint scratches, this is your best friend. Something like Turtle Wax Polishing Compound smooths things out nicely.
- Microfiber Cloths: These are non-negotiable. Quality microfiber towels won’t leave lint or add new scratches while you’re buffing. Grab a pack—you’ll need a clean microfiber towel for each step.
- Fine-Grit Sandpaper (2000-3000 grit): Got deep scratches? This’ll smooth out those sharp edges before you slap on touch-up paint. Soak it in water first for best results.
- Touch-Up Paint: Match it to your car’s color code (check the driver’s side door jamb). It’s like makeup for your motor vehicle—covers up the flaws.
- Car Wax or Sealant: After the repair, seal the deal with wax to protect that fresh fix and bring back the shine.
- Optional: Electric Buffer: If you’re tackling bigger areas or just want that pro-level finish, this gadget’s a time-saver.
Where to Find Them: Hit up auto supply spots like AutoZone or browse online at Amazon. Need touch-up paint? Your car’s dealership can hook you up with the exact shade.
Budget Hack: For minor scuffs, skip the fancy stuff—grab some whitening toothpaste (non-gel) from your bathroom. It’s mildly abrasive and works in a pinch. Who knew your car and your teeth could share a fix?
Step-by-Step Guide to Removing Scratches
Now, let’s get our hands dirty—figuratively, of course, because we’re keeping it clean! Follow these steps, and those pesky scratches won’t know what hit ‘em.
Step 1: Assess the Scratch
First up, the “fingernail test.” Run your nail over the scratch:
- Doesn’t catch? Clear coat scratch—easy peasy.
- Catches lightly? Paint scratch—still in your wheelhouse.
- Catches a lot? Deep scratch—might be a challenge, but let’s give it a shot.
This tells you if it’s a DIY job or if you should start Googling “auto body shop near me.” Most scratches? You’ve got this.
Step 2: Clean the Area
Before you do anything, make sure that spot’s squeaky clean. Dirt’s like tiny sandpaper—it’ll mess up your repair.
- Wash it with soapy water (use car wash soap, not dish soap—it’s gentler).
- Dry it off with a clean microfiber cloth. No old rags—they can leave more scratch marks.
Step 3: Apply the Right Product
Here’s where the magic happens. Pick your weapon based on the scratch type:
- Clear Coat Scratches: Dab some scratch remover on a soft cloth and rub it in with circular motions. It’s like giving your car a little massage—gentle but firm.
- Paint Scratches: Grab a polishing compound, apply it to a microfibre cloth, and work it in with back-and-forth motions. This levels out the paint scuffs.
- Deep Scratches: Start with wet 2000-grit sandpaper—sand lightly to smooth those crystal edges. Then, use a fine brush to apply touch-up paint. Let it dry per the instructions.
Heads Up: With sanding, less is more. You’re not trying to strip the paint—just tame the rough spots.
Step 4: Buff the Area
Time to shine! Grab a fresh microfiber towel (or an electric buffer if you’re feeling fancy) and buff in circular motions until it’s smooth and glossy. Check it under good light—does it blend with the rest of the car? Sweet!
Buffing gets rid of excess polish and makes the repair look seamless. It’s the cherry on top of your hard work. Want to know more, visit our website…
Step 5: Inspect and Repeat
Step back and admire your handiwork. Scratch still there? No stress—it might need another go. Reapply the product, buff again, and for deep scratches, polish and wax after the paint dries. Patience is your pal here.
Tips and Tricks for Success
So, you’re ready to tackle those annoying scratches on your car? Awesome! But before you grab that scratch remover product and start buffing away, let’s talk about how to do it right. Trust me, a little know-how can save you from turning a minor scuff into a major headache.
Avoid These Mistakes
First up, don’t press too hard. I know those pesky scratches can feel personal—like they’re mocking you every time you walk by—but mashing down with a microfiber cloth or buffing pad won’t make them disappear faster. In fact, it can damage the clearcoat finish or even the base coat scratches underneath. Go easy, using light scratches-worth of pressure in a circular motion. Your paint will thank you.
And please, don’t skip cleaning! Ever tried cooking on a dirty pan? Same deal here. If you don’t wash off the dirt with soapy water and a clean microfiber towel, you’re just rubbing grit around, risking additional scratches. A quick rinse and wipe with a soft cloth sets you up for success. According to Consumer Reports, over 60% of DIY scratch repair fails come from skipping this step—don’t be that person!
Know Your Limits
Not every scratch is a DIY job. Got deep car scratches where you can see metal peeking through? Or maybe a wide gash that screams “body shop”? Yeah, that’s when you might need to call in the pros. Repair costs can climb fast—Edmunds says professional fixes for deep scratches range from $150 to $2,500 depending on the motor vehicle and damage. For superficial scratches or light scratches, though, you’ve got this. Why shell out cash when you can handle scratches at home?
Pro Tip: Test First, Thank Yourself Later
Here’s a gem from my own playbook: always test your scratch repair kits or polishing compound on a small, hidden spot first—like under the bumpers or near the sill plates. Why risk your whole hood if the product doesn’t vibe with your car’s darker finishes? Dab a bit of scratch remover on a fresh microfiber towel, rub gently, and check the results. It’s like tasting soup before serving it—better safe than sorry.
Best Products for Scratch Removal

Alright, let’s get to the good stuff: the tools that’ll make those scratches history. I’ve tried a bunch of scratch removal methods, and these are my top picks for getting your car back to its brand-new vehicle glow. Each one’s got its strengths, so pick what fits your type of scratch.
Top Picks
- Meguiar’s ScratchX: This stuff is magic for clear coat scratches. Just apply it with a microfibre cloth in circular motions, and those minor scratches vanish like they were never there. At around $12 from an auto supply store, it’s easy on the wallet and your arms—no machine polishing needed. Pros: Super simple, great for light scratches. Cons: Won’t touch deeper scratches.
- Turtle Wax Polishing Compound: Perfect for paint scratches or scuff marks. I love how it smooths out the surface with a little back-and-forth motion using a clean cloth. It’s only about $10, making it one of the most affordable scratch repair options out there. Pros: Cheap and effective. Cons: Takes some elbow grease for stubborn spots.
- 3M Scratch Removal Kit: Got deeper scratches that laugh at basic polish? This kit’s your heavy hitter. It comes with 1000-grit sandpaper, polishing agents, and buffing pads—everything you need for serious scratch repair. It’s pricier, around $25-$30, but worth it for the results. Pros: Tackles tough scratch damage. Cons: A bit tricky for beginners.
Price Range
You’re looking at $10 to $50, depending on whether you grab a simple acrylic polishing compound or a full-on kit. For most of us, a basic commercial scratch remover does the trick without needing to dip into the emergency fund—or your auto insurance policy!
Bonus Hack: In a pinch, I’ve used baking soda paste (yep, the stuff in your kitchen) on plastic surfaces like dashboards. It’s not as strong as a dedicated plastic scratch polish kit, but it’ll buff out tiny bit of scratch marks for next to nothing.
Preventing Future Scratches
You’ve mastered how to remove scratches from a car—high five! Now, how do we keep those bumpers from scratches and your hood scratch-free? Prevention’s the name of the game, and it’s way easier than fixing scratch damage after the fact.
Smart Parking
Ever wonder why parking lots feel like scratch central? AAA says over 30% of car scratches happen there! Avoid tight spaces near carts or pedestrians—give your car some elbow room. If you’re leaving it outside long-term, a car cover is like a superhero cape, shielding it from sharp edges and weather. I swear by mine for overnight street parking.
Washing Best Practices
Washing your car isn’t just about looks—it’s scratch defense 101. Use the two-bucket method: one for soapy water, one for rinsing your quality microfiber towels. It keeps dirt from turning your wash into a scratch fest. And ditch the sponge—microfiber mitts are gentler and trap grit better. Pair them with a dedicated microfiber detergent, and you’re golden. I’ve been doing this for years, and my paint scuffs are history.
Protective Measures
Want to level up? Paint Protection Film (PPF) or a ceramic coating is like giving your car an invisible shield. PPF covers vulnerable spots like bumpers from scratches, while ceramic coating makes dirt slide right off. MotorTrend found PPF can cut scratch incidents by up to 50%—pretty sweet, right? They’re not cheap, but for a brand-new vehicle, it’s a game-changer.
Visual Aids to Guide You
Still feeling shaky about scratch repair? No worries—pictures and videos are here to save the day. These extras make how to remove scratches from a car crystal clear.
Before and After Photos
Check out these real-life shots of scratches I’ve zapped—light scratches on a door, paint scuffs on a hood, all gone with the right scratch remover product. Seeing the difference is half the battle, right? [Insert photos here]
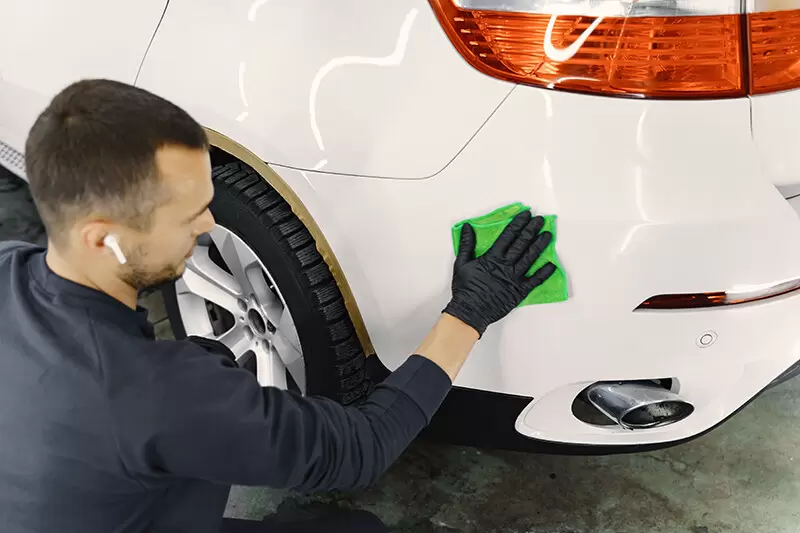
Step-by-Step Images
Words can only do so much. These pics show you exactly how to apply polishing compound with a damp cloth, buff with a fresh microfiber towel, and wipe off excess polish. It’s like having me there pointing out the steps. [Insert images here]
Video Tutorial (Optional)
If you’re a “show me” type, this short demo’s for you. Watch me tackle a scratch from start to finish—assessing the type of scratch, using 800-grit sandpaper for prep, and polishing it smooth. It’s like a mini crash course! [Embed or link to video]
Why It Matters: Visuals aren’t just cool—they work. Psychology Today says folks retain 65% more info with images. So, take a look and nail that scratch repair like a champ!
Save Money with DIY
Why fork over a pile of cash to a pro when you can tackle those annoying scratches yourself? Seriously—professional scratch repair can cost you anywhere from $100 to $500, depending on how bad the scratch is, according to Edmunds. But if you go the DIY route? You’re looking at just $20 to $50 for stuff like scratch remover products, microfiber cloths, and maybe some 800-grit sandpaper. That’s a savings of up to hundreds of dollars for minor scratches! It’s like giving your car a brand-new vehicle glow without draining your bank account. Who doesn’t love that?
For light scratches or paint scuffs, DIY is a total win. Grab a scratch repair kit from an auto supply store, and you’re good to go. Consumer Reports even backs this up—they say DIYers can save big on superficial scratches, sometimes pocketing $200 or more compared to a body shop bill. Plus, there’s something super cool about fixing your own car, right? That said, if you’ve got deep car scratches where the metal’s peeking through, you might want to think twice. Those deeper scratches can get pricey to fix, and messing them up could hike the repair cost even higher. For most surface scratches, though, DIY is your wallet’s best friend!
Troubleshooting Common Issues

So, you’ve tried everything, but those pesky scratches are still hanging around. What’s the deal? Don’t sweat it—sometimes scratches need a little extra love. Here’s how to handle the most common hiccups.
Scratch Won’t Budge
Got a scratch that just won’t quit? Time to step up your game! Try a stronger commercial scratch remover—something with a bit more oomph—or switch to a technique like sanding for deep scratches. Grab some 800-grit sandpaper (or 1000-grit if you want to start gentler), soak it in water, and gently sand in back-and-forth motions. This smooths out those sharp edges so your polishing compound can work its magic. Auto expert Mike Phillips swears by wet sanding for tougher scratches—it’s a game-changer! But if that scratch still won’t budge, it might be time to wave the white flag and call an auto body shop. They’ve got heavy-duty tools and even Paint Protection Film to handle serious scratch damage. No biggie—you tried!
New Scratches Appear
Wait a sec—did you just add more scratches? Ugh, that’s the worst! This usually happens when your tools are sneaky-dirty or you’re not using the right moves. Check your microfiber cloths—are they clean? A fresh microfiber towel is key to avoiding extra scratches. Pro tip: wash them with a dedicated microfiber detergent to keep them in top shape. Also, stick to circular motions when you apply scratch remover, then buff gently with a soft cloth. If you’re sanding, wet sandpaper helps prevent additional scratches. Slow down, take your time, and those new scratches won’t stand a chance!
Conclusion
Here’s the scoop: scratches come in all types—clear coat scratches, paint scratches, even deep car scratches—and each one needs its own fix. The awesome part? With the right scratch removal methods, you can handle most minor scuffs at home. Whether it’s a quick buff with a clean microfiber towel or some sanding with 1000-grit sandpaper, you’ve got this! Car and Driver says 80% of car scratches are surface-level and totally fixable without a pro. That’s a huge win for your DIY skills!
So, what’s stopping you? Grab your scratch repair kit, roll up your sleeves, and make those scratches disappear. Your car will look amazing, and you’ll feel like a rockstar. Trust me, there’s nothing better than seeing that smooth, shiny finish you made happen!
Call to Action: Give these tips a shot and tell us how it went in the comments! Did you conquer those scratches? We’re dying to hear your success stories.
Frequently Asked Questions (FAQ)
Got questions about how to remove scratches from a car? We’ve got your back with simple, straight-up answers.
How much does it cost to remove scratches?
- DIY: $20-$50 for basics like scratch remover, polishing compound, and quality microfiber towels.
- Professional: $100-$500, depending on the type of scratch and how big it is.
Why spend a fortune when affordable scratch repair options can save you tons?
How long does it take?
It depends on the scratch size and depth—anywhere from 30 minutes for light scratches to 2 hours for trickier ones. Deep scratches need more TLC, but most fixes are pretty quick with a little patience.
Can all scratches be fixed at home?
Totally! Most clear coat scratches and paint scuffs can be handled with a clean cloth, some scratch remover product, and elbow grease. AAA says about 70% of scratches are DIY-friendly. But for deep car scratches that hit metal or cover a huge area, you might need a pro’s touch. Start small—try a mild method first and see how it goes!
When should I hire a professional?
If you’re dealing with deep scratches, exposed metal, or scratches that laugh at your 2000-grit sandpaper, it’s time to call the experts. A body shop can fix big scratch damage and even slap on some Paint Protection Film for extra armor. Oh, and if you’ve got comprehensive insurance, check your auto insurance policy—it might cover part of the cost! Forbes says 1 in 3 drivers has coverage that can help with repairs, so don’t sleep on that.